Hobart’s Scenic and Artistic Highlights in One Day
Trying to decide how to spend a day in Hobart? This combined tour of Mt Wellington and MONA offers a balanced mix of natural beauty and cutting-edge art that appeals to a variety of travelers. With seasoned guides, comfortable transportation, and included ferry tickets, it promises a hassle-free way to see some of Tasmania’s most iconic sights.
Three things we particularly like about this experience are the chance to stand atop Mount Wellington and enjoy spectacular views, the engaging commentary from guides who are clearly passionate about Hobart’s history and environment, and the opportunity to explore Australia’s largest private art collection at MONA.
A possible downside? The weather can be unpredictable—clouds and rain might obscure the mountain views, which some reviews noted as a bummer. Still, the overall value remains high, especially considering the included ferry ride and entrance fees.
This tour is perfect for travelers who want a comprehensive snapshot of Hobart in just one day—combining nature, history, and contemporary art—without the hassle of planning multiple excursions. It’s well-suited for those who appreciate storytelling, scenic vistas, and unique cultural experiences.
Key Points
 1 / 4
1 / 4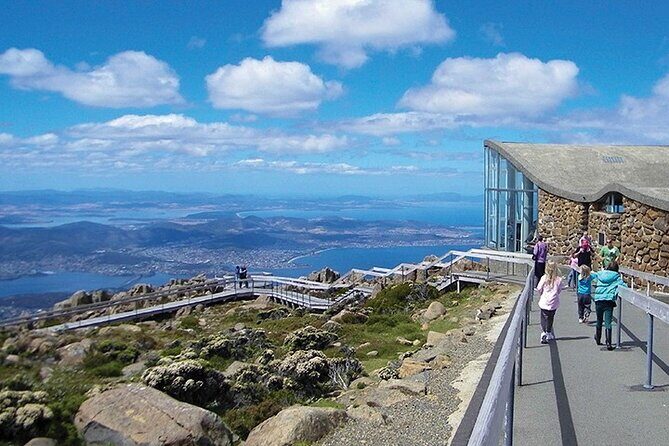 2 / 4
2 / 4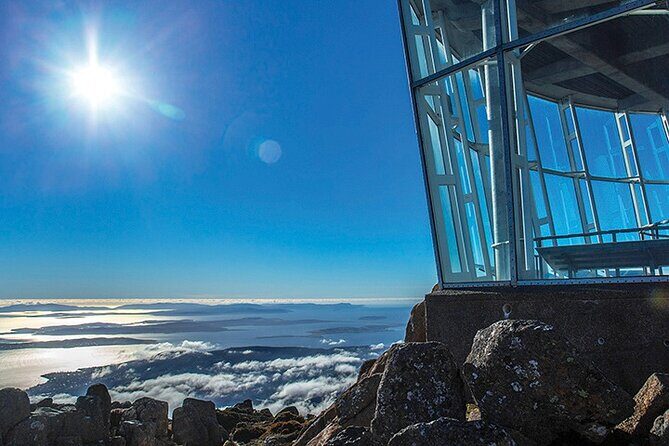 3 / 4
3 / 4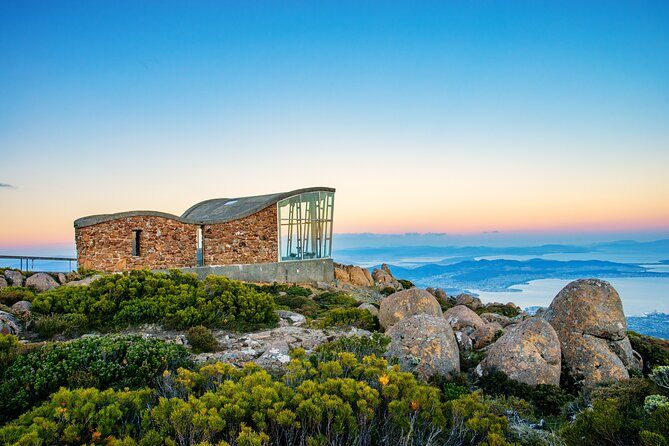 4 / 4
4 / 4- All-in-one experience: combines Mt Wellington’s panoramic views with MONA’s eclectic art collection
- Expert guides: knowledgeable and engaging guides enrich the experience with stories and insights
- Comfort and convenience: includes hotel pick-up, ferry tickets, and transportation
- Flexible timing: about 7.5 hours, with plenty of opportunities for photos and exploration
- Weather-dependent: mountain views rely on clear weather; MONA visit remains fascinating regardless
- Great value: includes ferry and entry fees, making it a cost-effective way to see Hobart
👉 See our pick of the Our 3 Favorite Hobart Workshops & Classes
Exploring Hobart in Style: Mt Wellington and MONA
If you’re after a day that balances breathtaking scenery with modern artistic flair, this tour could be just what you need. For a reasonable price, you get transportation, guided commentary, and the chance to experience some of Tasmania’s most treasured spots—all in one seamless package.
You can also read our reviews of more tours and experiences in Hobart.


The Itinerary Breakdown
The day kicks off with a pickup from your Hobart accommodation (or central meeting point, depending on your booking). The journey to Mount Wellington takes roughly 45 minutes, during which your guide will share local tidbits, history, and maybe even some jokes—one reviewer mentioned a guide named Mark who kept everyone entertained with his storytelling and humor.
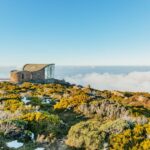
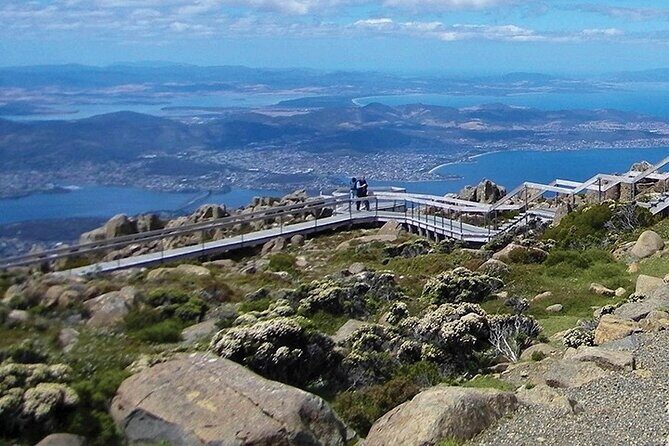
Mount Wellington offers more than just a photo op. We loved how the tour emphasizes the mountain’s diverse eco-systems and the stark beauty of its alpine environment. As you ascend, you’ll pass notable formations like the Organ Pipes, a natural rock formation that’s quite the sight. The summit visit typically lasts around 30 minutes, giving ample time to snap photos, breathe in the crisp air, and soak up the panoramic views of Hobart and the surrounding landscape.
The weather can be hit or miss, and some guests noted that clouds or rain might obscure the vistas. One reviewer summed it up: “It was a little cloudy and there was a bit of rain when we reached Mt Wellington, but the view was still really great, and the guide’s explanations made it memorable.” So, while clear skies are ideal, even overcast days lend a mysterious charm to the landscape.
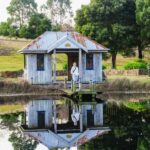
Next, the tour moves to the Cascade Gardens, a historic and tranquil spot dating back to 1827. Here, you’ll see beautifully maintained gardens and the remains of the Cascades Female Factory, offering a poignant glimpse into Tasmania’s convict past. The guide’s commentary brings the site to life, giving context about the women who once lived and worked there. Reviewers appreciated the short stop here, describing it as “one of Hobart’s most picturesque and historic gardens,” and noting that it’s a peaceful contrast to the mountain’s rugged terrain.
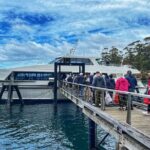
The highlight of the afternoon is a visit to MONA, accessible via a relaxing ferry cruise along the Derwent River. The ferry ride itself is part of the experience—an opportunity to enjoy the water views and get excited for what’s inside the museum. Once at MONA, you’ll explore Australia’s largest private collection of art, ranging from ancient Egyptian mummies to provocative contemporary installations.
Guests have described MONA as “strange,” “crazy,” and “weird,” yet fascinating and worth seeing. Reviewers loved the diversity of the collection, with one mentioning that it’s a “huge collection of unique art, some beautiful and some just plain bizarre.” The architecture of the museum is striking, adding to the sense that you’re stepping into a space unlike any other in Australia.
The tour concludes with a short stop at the Cascades Female Factory, where your guide provides a brief but insightful overview of the historical significance of this convict site. While the exterior is the main feature—since entrance isn’t included—guests appreciated the context given by their guides, making the site a meaningful addendum to the day.
Transport and Practicalities
The entire experience is delivered via an air-conditioned vehicle, which keeps everyone comfortable regardless of the weather. Pickup is included, simplifying logistics, especially for travelers unfamiliar with Hobart’s public transport. The tour caps at 45 travelers, striking a balance between a lively group and a personal experience.
Timing is carefully managed. The tour departs at 9:00 am from the Mona Brooke Ferry Terminal, allowing plenty of time for each stop. The ferry ride back from MONA is included, and guests can often ask to change the return time, adding flexibility.
What Do Travelers Say?
Reviews give a well-rounded picture. Many praise the knowledgeability of the guides, with one noting that their driver, Baz, “kept us engaged from start to finish with his stories and jokes.” Views from Mt Wellington are a recurring highlight, with some guests describing them as “stunning,” while others noted that cloud cover blocked the best scenery.
At MONA, opinions vary: some find it “really interesting,” others think it’s “not that spectacular,” but universally, it’s a unique experience that encourages questioning and curiosity. The included ferry ride and entrance fee are seen as good value, especially considering the diverse itinerary.
Who Is This Tour Best For?
This tour suits travelers who want a balanced mix of nature and arts in a single day without the hassle of organizing multiple tickets or transport. It’s ideal for people who enjoy learning from guides and appreciate authentic local stories.
If you’re a visual person, the views from Mt Wellington alone justify the trip, but if modern art intrigues you, MONA’s vast collection will keep you captivated. It also works well for groups or families, thanks to the small group size and comfortable logistics.
Considerations
Weather can influence the mountain experience, so it’s worth checking the forecast and dressing appropriately. If you’re not a fan of modern art, you might find MONA’s offerings strange or challenging, but even that makes it interesting.
FAQ
Is hotel pickup included?
Yes, the tour offers pickup from Hobart accommodations, making it easy to start the day without extra planning.
How long is the entire tour?
It lasts approximately 7.5 hours, including all stops, transportation, and the ferry ride.
What’s the best time to visit Mt Wellington?
Clear weather makes for the best views, but the mountain can be visited year-round. Keep in mind that clouds and rain can obscure the scenery.
Are entrance tickets to MONA included?
Yes, your ticket to MONA is included in the price, along with the ferry ride.
Is there time for lunch?
Lunch is not included, so you might want to bring snacks or plan to buy something at MONA or nearby.
Can I customize the return ferry time?
Yes, guests can often adjust the ferry timing, offering flexibility to fit your schedule.
Is this suitable for all ages?
Most travelers can participate, though younger children should be comfortable with walking and weather conditions.
What’s the group size?
The tour limits to 45 travelers, ensuring a comfortable experience with personalized attention from guides.
Final Thoughts
This Hobart tour offers a well-rounded experience that captures the essence of Tasmania’s natural and artistic appeal. You’ll love the stunning vistas from Mt Wellington—weather permitting—and the chance to explore MONA’s daring art collection. The inclusion of ferry tickets and expert guides makes this a convenient, value-packed option for anyone wanting to see the highlights without the stress.
While weather can be a gamble, the overall journey is engaging and educational, with plenty of opportunities to take photos, learn local stories, and soak up the unique atmosphere of Hobart. Whether you’re a nature lover, art enthusiast, or simply in search of a memorable day out, this tour offers a compelling way to experience Tasmania’s capital.
In essence, if you want a thoughtfully curated day that balances scenic mountain vistas with cutting-edge art, and you value knowledgeable guides and good logistics, this tour is a smart choice. It suits travelers who appreciate both the raw beauty of the outdoors and the creativity of modern collections—making it an enriching addition to any Tasmanian itinerary.